Basics, Pt. 1 - Win Conditions & Lines
This is how you win.
Win Condition
/win kənˈdiSHən/
noun
- A way to win the game.
In the end, all that matters is winning locations and total power.
Identifying win conditions is how you mitigate bad draws.
Every deck has multiple win conditions, and some are not obvious. The flashy combo is fun, but anything that gets you more points on a location can be a win condition. Know the ways your deck can win - there’s more than you think!
. . . . . . .
An Example
For example, let’s look at this deck:
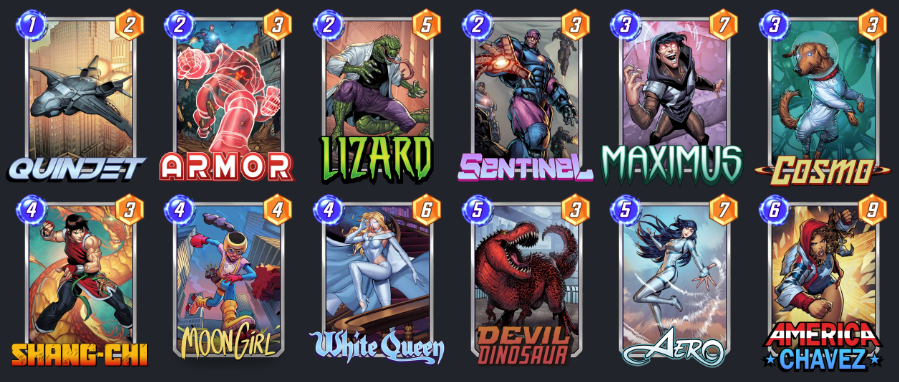
How many possible win conditions can we come up with?
- Use Sentinel and White Queen to grow our hand for Devil Dinosaur.
- Build an early lead with Lizard and Maximus, then use Aero to maintain it.
- Use Moon Girl to duplicate finishers like Devil Dinosaur.
- Flood the board with copied cards using Quinjet.
- Gather intel with White Queen, then disrupt with Cosmo and Shang Chi.
And this is only a start! More win conditions will emerge over the course of the game, as you discover interactions between locations and your opponent’s cards.
Line
/līn/ (also: play line)
noun
- A plan for playing your cards on each of your turns.
Optimal Lines
Many decks have an optimal line. For example, look at this Spiderman control deck:
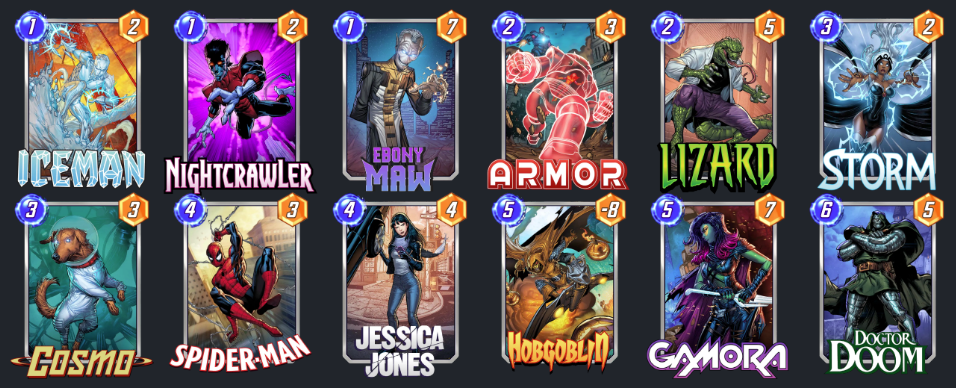
This deck suggests a very specific line:
- Turns 1-2 - Iceman, Armor, Lizard, and/or Ebony Maw to build power on one location
- Turn 3 - Storm on a different location
- Turn 4 - Jessica Jones on the Storm’ed location
- Turn 5 - Spiderman, Hobgoblin, or Gamora on the third location
- Turn 6 - Doctor Doom to add 5 power to every lane
If you draw every card perfectly, this deck can be very effective at locking down your opponent and putting up strong challenges on every lane.
Play Lines
But card games are inherently random, and so our lines must reflect the likelihood of bad draws or curveballs from our opponents.
Many novice players fall into the trap of only thinking one turn ahead. But if you’re taking your time, you can come up with a plan for all the cards in your hand every turn.
Of course, options constantly evolve as the game progresses, and you will need to constantly adjust this plan for the best path to achieve one or more of your win conditions.
With each card you play, imagine how it will look at the end of the game. Which locations have you developed the most? Have you spread your power too thin? It’s easy to fall into the trap of running on autopilot, making plays without fully considering their long-term consequences.
Your line might include the possibility of drawing certain cards, but don’t depend on it - the odds aren’t in your favor! Instead, focus on how you can make the best use of the cards currently in your hand.
A Real World Example
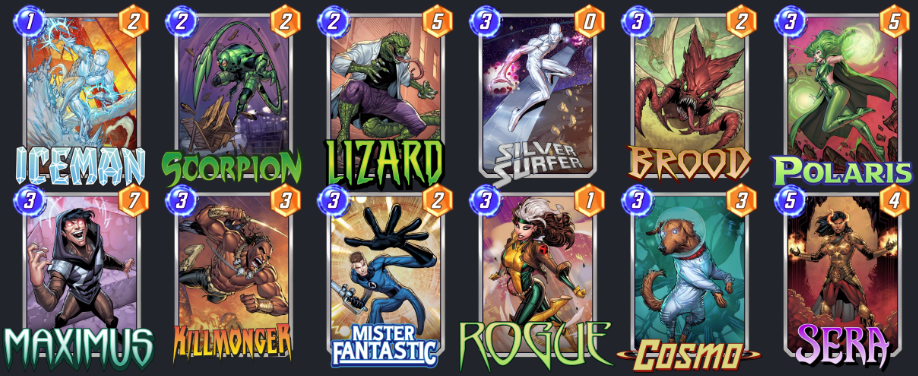
For this example, we’ll be using this Silver Surfer deck:
Turn 1
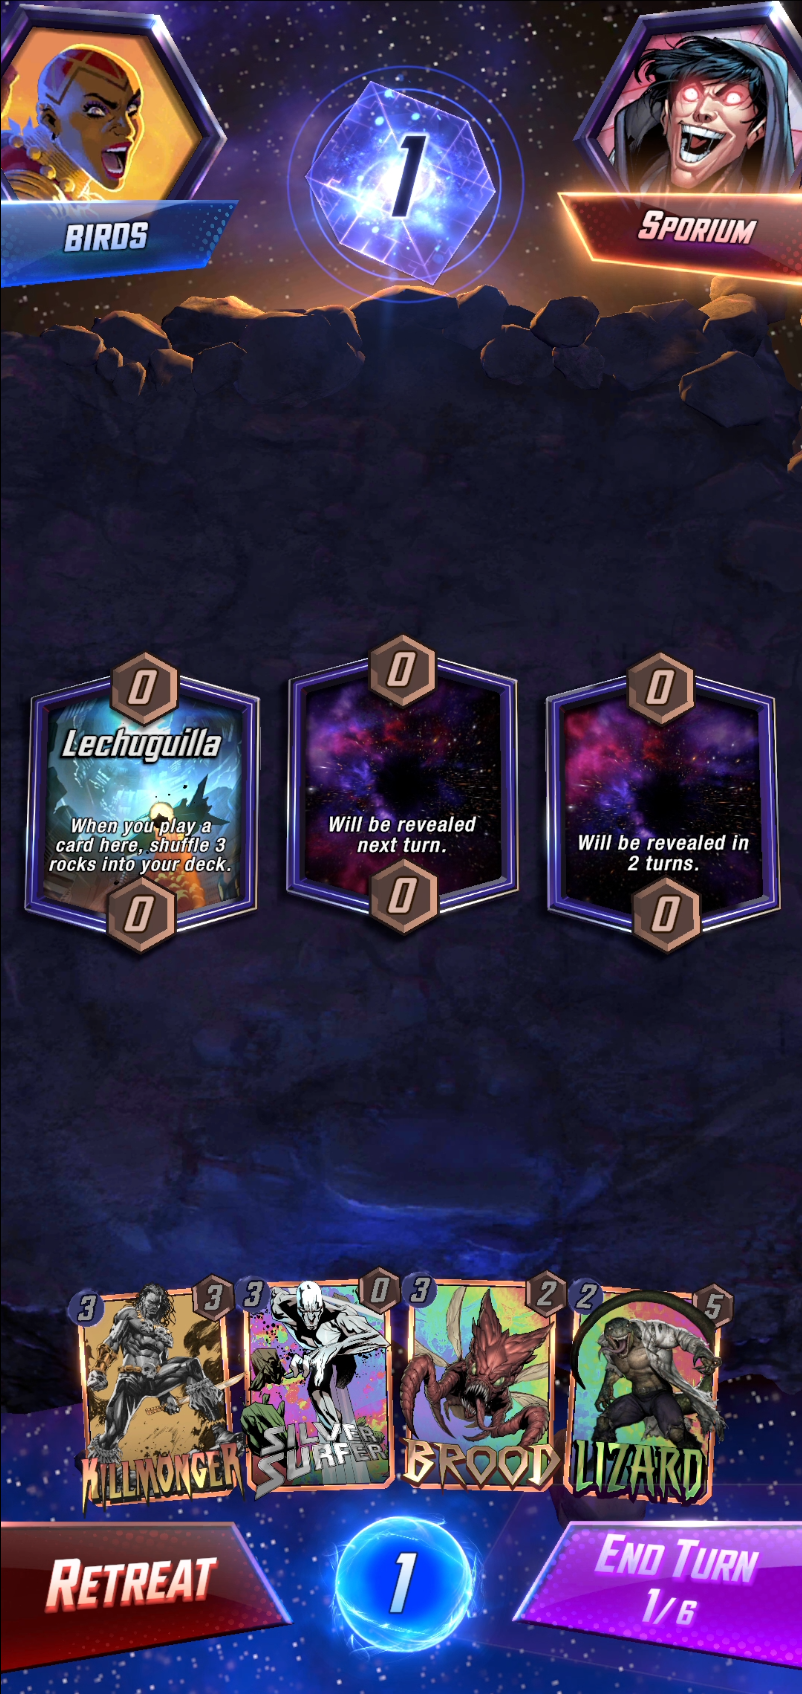
This is a great starting hand - we’ve got Brood and Silver Surfer at the core of our win condition, and Lizard to play on turn 2.
But Lechuguilla is not great for us (or my opponent). Without a 1-cost card to play, we’ll end our turn and hope for better luck at the second location.
Our line is pretty straightforward at this point:
- Turn 2 - Lizard
- Turn 3 - Brood
- Turn 6 - Killmonger and Silver Surfer
. . . . . . .
Turn 2
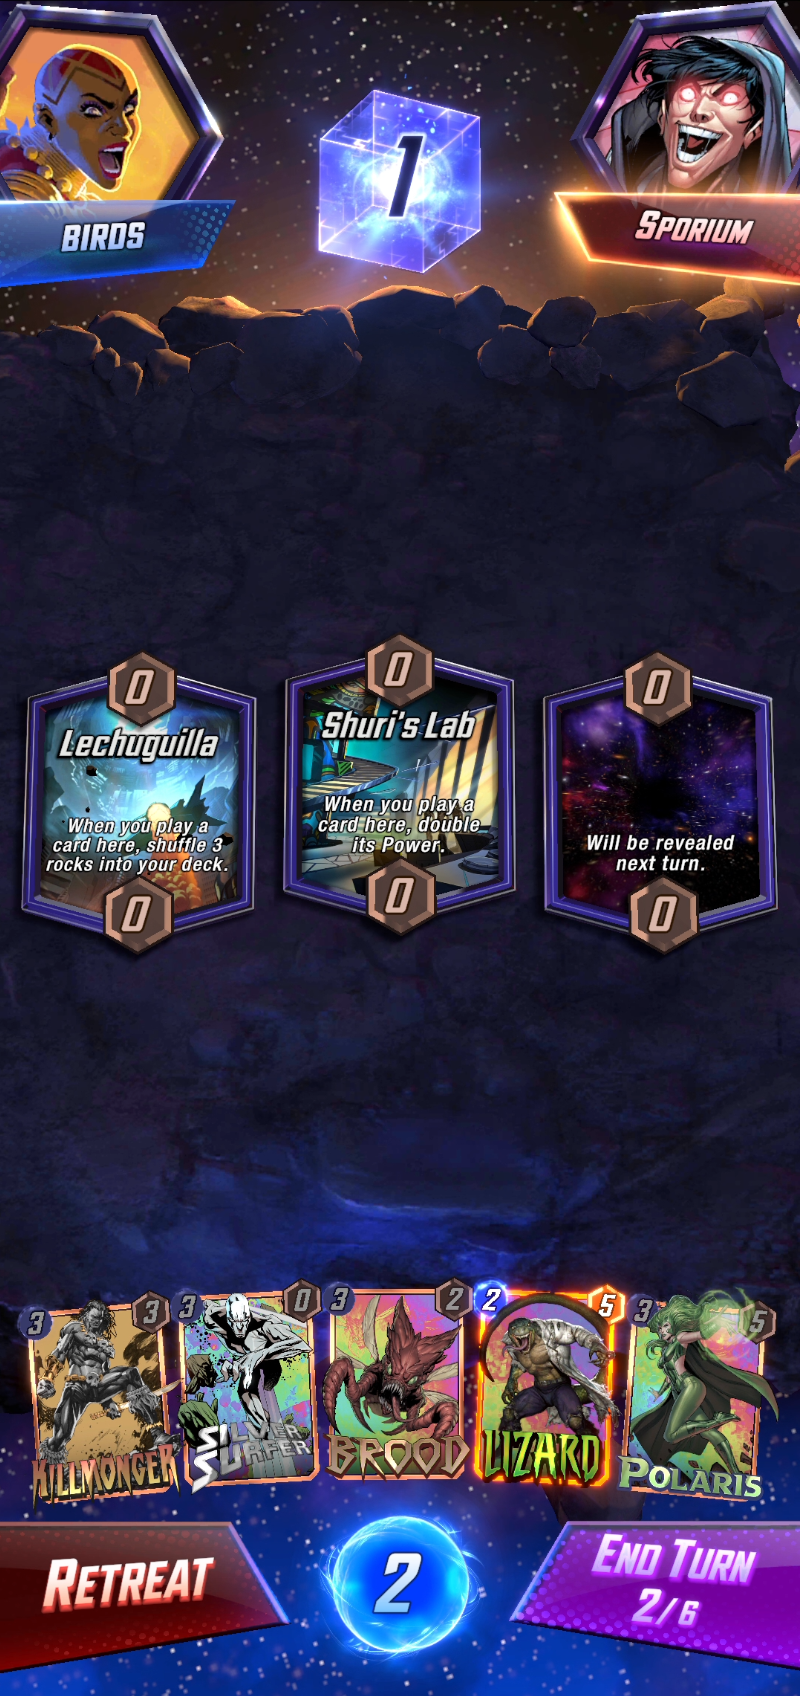
Turn 2 reveals Shuri’s Lab - a great location for us. Shuri’s is a natural match for Lizard, setting up an early advantage and mitigating his ongoing effect.
We also drew Polaris, another perfect play for Shuri’s. If we can drag a low-cost card onto this location, we can lock our opponent out of a free doubling. At this point, we’re likely committed to Shuri’s Lab for our win condition.
Our line develops rapidly from here:
- Turn 2 - Lizard
- Turn 3 - Polaris
- Turn 4 - Brood
- Turn 6 - Killmonger and Silver Surfer
While we don’t have much of a read on our opponent, we likely have a better hand then they do.
So, we snap, to lock in this early advantage before revealing out hand, and play Lizard to Shuri’s Lab.
. . . . . . .
Turn 3
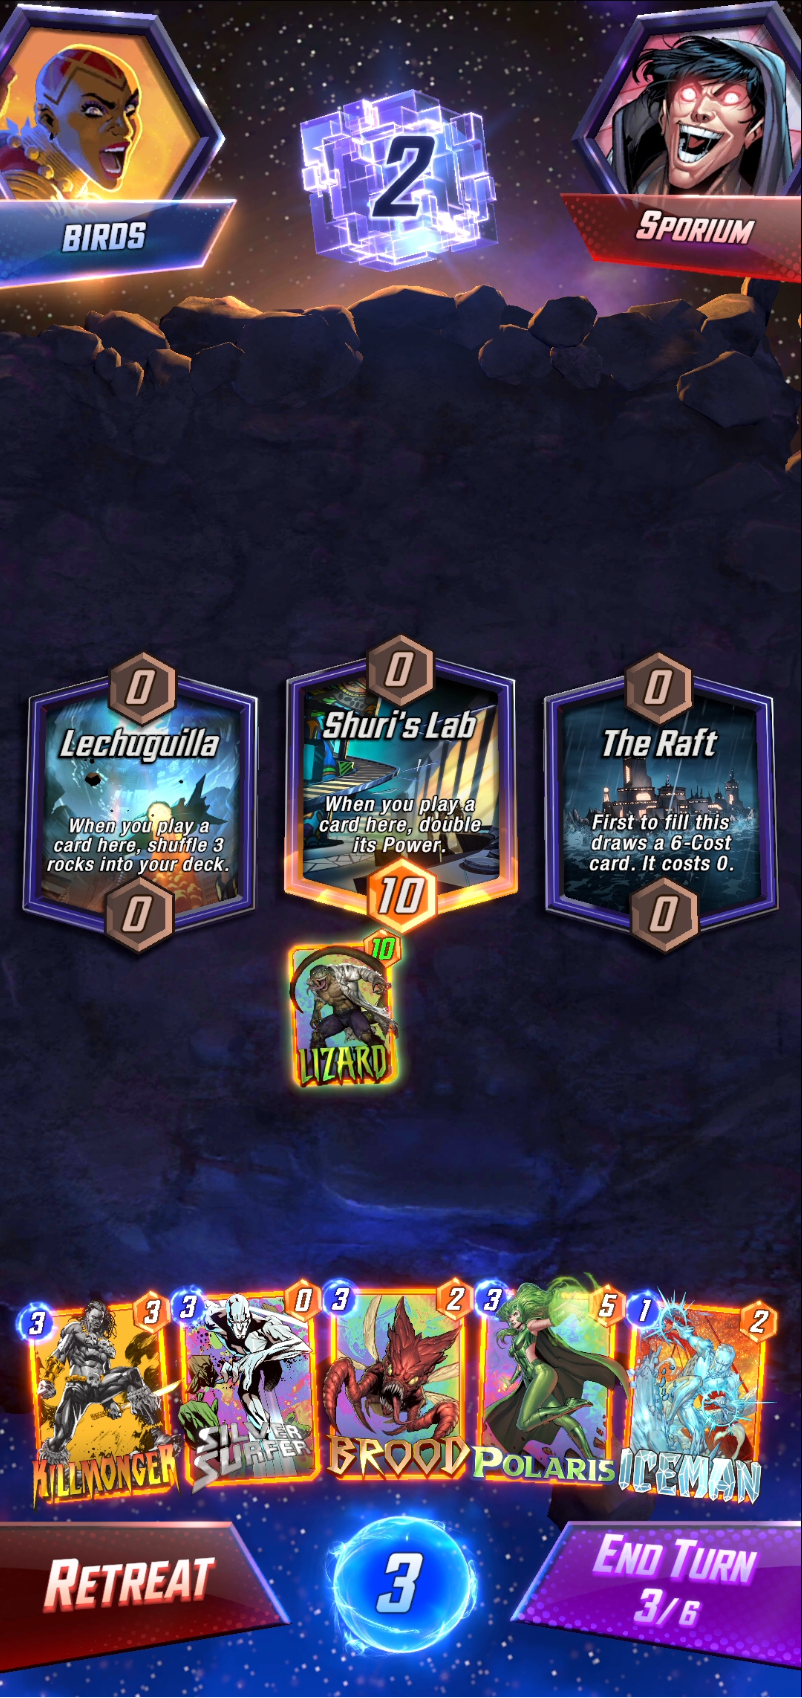
Turn 3 reveals The Raft, a natural match for Brood. We also draw Iceman, giving us a 1-cost card to play on curve alongside a 3-cost next turn. This is very good.
However, playing Killmonger will destroy Iceman, so we should likely play him first. This also saves Brood as a surprise, hopefully baiting our opponent into dropping cards into The Raft instead of Shuri’s Lab.
Our opponent hasn’t played anything yet - either they’ve had a bad draw, or are playing a high curve deck like Electro or Galactus.
Either way, our ability to play on curve has given us a distinct early advantage, so it’s good that we’ve already locked in the second cube.
At this point, we’re committed to our lanes, with most of our cards likely being played to Shuri’s Lab and The Raft. Here’s one possible line.
- Turn 3 - Killmonger
- Turn 4 - Brood and Iceman
- Turn 5 - Polaris
- Turn 6 - Silver Surfer
However, getting a free card from The Raft may change this, so we’ll keep our options open. What would you play, and where?
